Example Azure Cloud Service That Upload Files
Azure Hulk Storage offers a uncomplicated way to store files such as images or JSON information in the cloud. This tutorial will teach you how to write data to Azure Blob Storage from a C# application.
Creating a Storage Account
Before jumping into Visual Studio, we need to create an Azure Storage Account. In the Azure portal, create a new resources and create a Storage Account. It's usually listed in the list of popular products.
First, select your subscription and resources group. We're going to create a new resource grouping and proper noun information technology blobstorage.
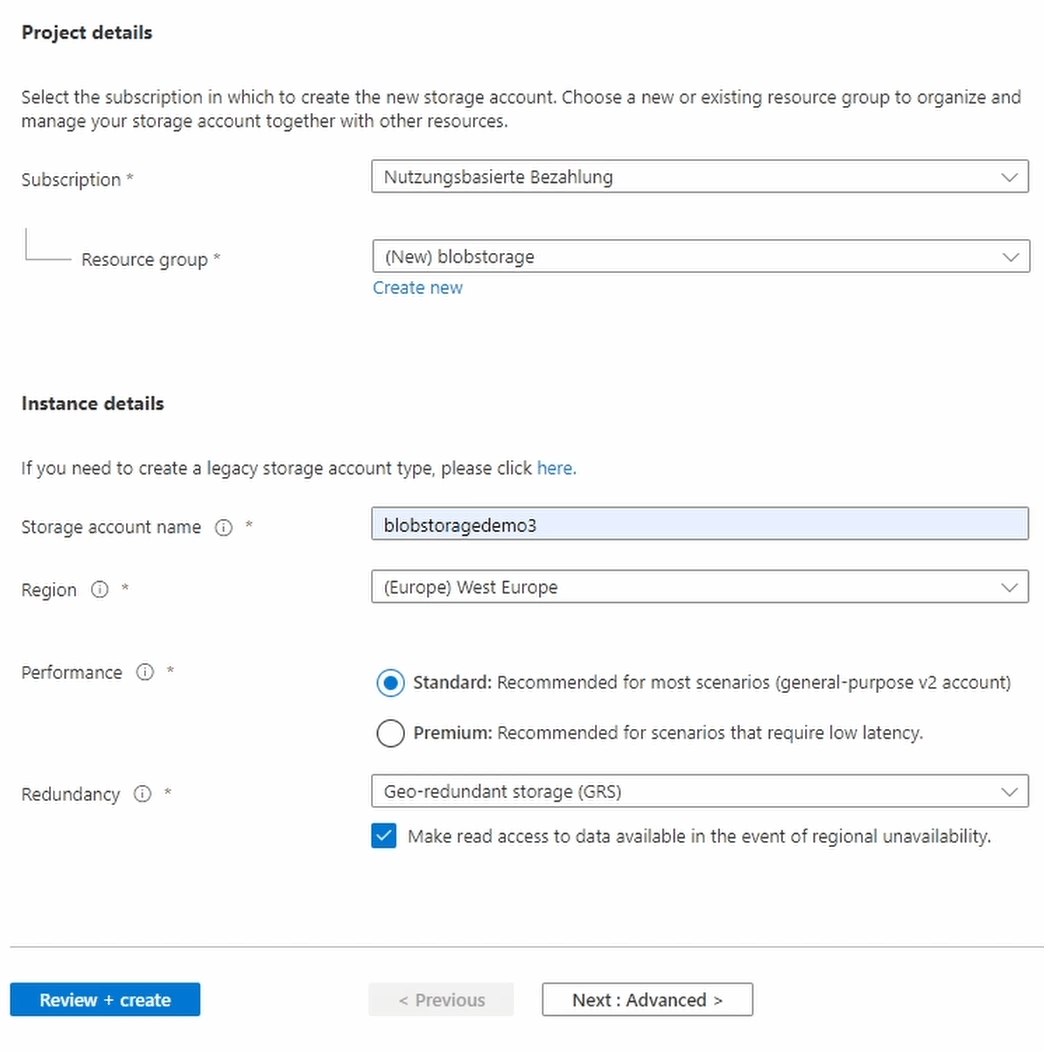
Next, we need to provide a globally unique storage account proper name. We go with blobstoragedemo3. We choose Due west Europe equally the region and employ the standard operation tier. Nosotros choose Locally-redundant storage (LRS). Both are the cheapest options at the time of recording this tutorial.
Performance and redundancy are out of the telescopic of this tutorial. Brand sure you understand the differences in terms of cost every bit I am non responsible for your spending.
In the Advanced tab, you can enable and disable different options. For example, you lot tin can disable the public blob access. That's what we do for this tutorial. For everything else, we use the default selection.
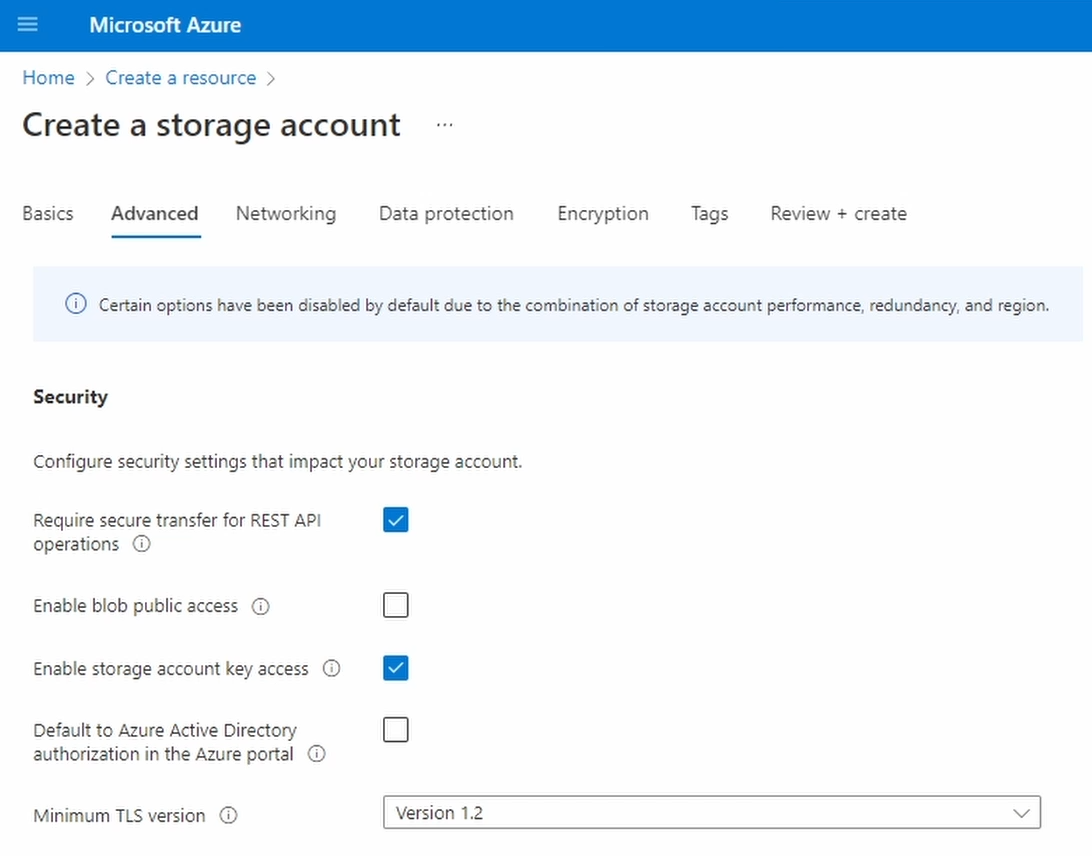
The other tabs contain additional configuration options that we don't demand to change for this tutorial. Nosotros click on the Review & Create push button to review our service configuration and create the Azure Storage Account.
Creating a Container
When Azure has completed the operation, nosotros open the container's menu and create a container that volition agree our information.
We click to open the New Container dialog in the toolbar and provide a name. We choose fileupload as the container name. The name has to be unique within the storage account.
We click on Create and expect for Azure to finish the functioning.
Before nosotros start evolution, we open the Access keys bill of fare and click on the Prove keys toolbar action. Nosotros then copy the connectedness string of key1 into the clipboard.
Implementing the File Upload
In Visual Studio, I created a C# Console awarding.
The new .NET 6 project templates utilize height-level statements. If you aren't familiar with the new .NET half-dozen features, watch this video.
Starting time, we open up the NuGet bundle manager and install the Azure.Storage.Blobs packet.
After the installation is completed, we open up the Programme.cs over again and define 2 variables. First, nosotros create a blobStorageConnectionString variable and insert the connection cord we copied from the Azure portal.
using Azure.Storage.Blobs; Console.WriteLine("Starting..."); var blobStorageConnectionString = "DefaultEndpointsProtocol=https;AccountName=blobstoragedemo3;AccountKey=XYZ;EndpointSuffix=cadre.windows.cyberspace"; var blobStorageContainerName = "fileupload"; var container = new BlobContainerClient(blobStorageConnectionString, blobStorageContainerName); var blob = container.GetBlobClient("nature.jpg"); var stream = File.OpenRead("nature.jpg"); wait blob.UploadAsync(stream); Console.WriteLine("Upload completed."); Second, nosotros create a blobStorageContainerName variable and assign the container'southward name, in our example, fileupload.
Next, we add together a using statement for the Azure.Storage.Blobs namespace. Below the variable definitions, we ascertain a container variable and assign an example of the BlobContainerClient. The start argument is the connection string, and the second argument is the container name.
Next, nosotros create a blob variable and call the GetBlobClient method on the container object. As the only statement, we provide the desired proper noun of the blob.
In this tutorial, I load an image from the hard bulldoze, merely y'all could likewise use any other stream or string and save it to the hulk. I create a stream variable and apply the File.OpenRead method and provide the proper name of the file resources.
Now, nosotros wait the blob.UploadAsync method and provide the stream as its statement. This line will finally upload the data onto the storage account.
Running the application
At present let's build and run the awarding.
At least we don't get any exceptions, and the program completes with the "Upload completed" message in the console.
Inspecting the Information in the Azure Portal
Now that we uploaded the data to the Azure storage account let's open the Azure portal to verify the upload. Open the container'southward menu in the Storage account and click on the fileupload container.
A list with all the blobs appears. We click on the nature.jpg blob to go more details and download information technology using the toolbar action.
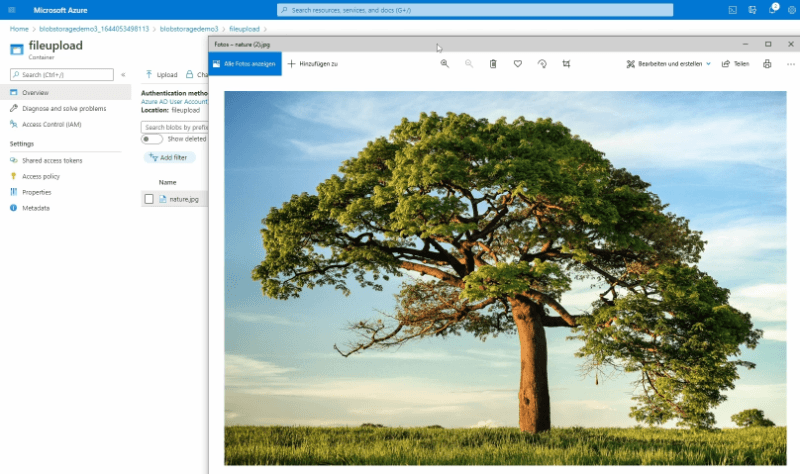
The browser downloads the file to the local disk. I open it, and we run into this beautiful image.
What's Side by side?
Azure Hulk Storage offers more advanced features for different scenarios. Y'all can read virtually information technology on the Azure Blob Storage official documentation.

delossantosontrad.blogspot.com
Source: https://www.claudiobernasconi.ch/2022/02/25/how-to-upload-a-file-to-azure-blob-storage-dotnet6/
0 Response to "Example Azure Cloud Service That Upload Files"
Post a Comment